Introduction
So, you’ve set up your Shopify store, and it’s running smoothly. Congratulations! But now comes the ongoing task of managing your store effectively. It might seem daunting at first, but don’t worry—we’ve got your back. This comprehensive guide will show you how to manage your Shopify store like a pro, even if you’re not a tech wizard. From editing your website to handling orders and customizing themes, we’ll cover it all. Remember to always back up your current theme and update to the latest version to ensure a seamless user experience and prevent potential issues. Let’s dive in!
Setting Up Your Shopify Store
Setting up a Shopify store can be an exciting venture, but it requires careful planning and execution. In this section, we will guide you through the process of setting up your Shopify store, from choosing the right theme to exploring the Shopify App Store for essential apps.
Choosing the Right Shopify Theme
Choosing the right Shopify theme is crucial for creating a visually appealing and functional online store. With thousands of themes available in the Shopify Theme Store, selecting the perfect one can be overwhelming. Here are some tips to help you choose the right theme for your store:
- Consider Your Brand’s Aesthetic and Style: Your theme should reflect your brand’s identity. Whether you’re going for a minimalist look or a vibrant, colorful design, make sure the theme aligns with your brand’s aesthetic.
- Think About the Type of Products You Will Be Selling: Different themes cater to different types of products. For instance, a theme designed for fashion stores might not be suitable for a tech store.
- Look for Themes That Are Responsive and Mobile-Friendly: With more customers shopping on their mobile devices, it’s essential to choose a theme that looks great on all screen sizes.
- Check the Theme’s Customization Options and Flexibility: A good theme should offer plenty of customization options, allowing you to tweak the design to fit your needs without needing to touch the code.
- Read Reviews and Check the Theme’s Ratings: Reviews and ratings can provide valuable insights into the theme’s performance and the support provided by the theme developer.
Exploring the Shopify App Store for Essential Apps
The Shopify App Store is a treasure trove of apps that can help you enhance your store’s functionality, improve customer experience, and increase sales. Here are some essential apps that you should consider installing:
- Shopify Shipping: This app streamlines your shipping process and helps you save time and money by offering discounted rates and easy label printing.
- Shopify Payments: Simplify your payment process by accepting credit card payments directly through Shopify. This app also helps you manage your finances more efficiently.
- Shopify Analytics: Gain valuable insights into your store’s performance with detailed reports on sales, customer behavior, and traffic. Use this data to make informed, data-driven decisions.
- Shopify Social Media: Integrate your social media channels with your store to reach a broader audience and drive more traffic. This app makes it easy to manage your social media presence from one place.
- Shopify Customer Service: Provide excellent customer support with tools that help you manage inquiries and support tickets. Apps like Tidio or LiveChat can enhance your customer service experience.
Finding Your Shopify Store URL
One of the first things you'll need is your Shopify store URL. It's like your store's address on the internet, making it easy for customers to find you. But how do you find it?
1. Log into your Shopify admin panel.
2. Look at the browser's address bar—the URL you see is your store's URL.
3. You can also find it under "Settings" > "Domains" in your Shopify admin.
Having your URL handy is essential for marketing and customer service. Always keep it accessible!
Editing Your Shopify Website
Keeping your website fresh and updated is crucial for maintaining customer interest. Whether it's updating product descriptions, adding new images, or tweaking the layout, regular updates are a must.
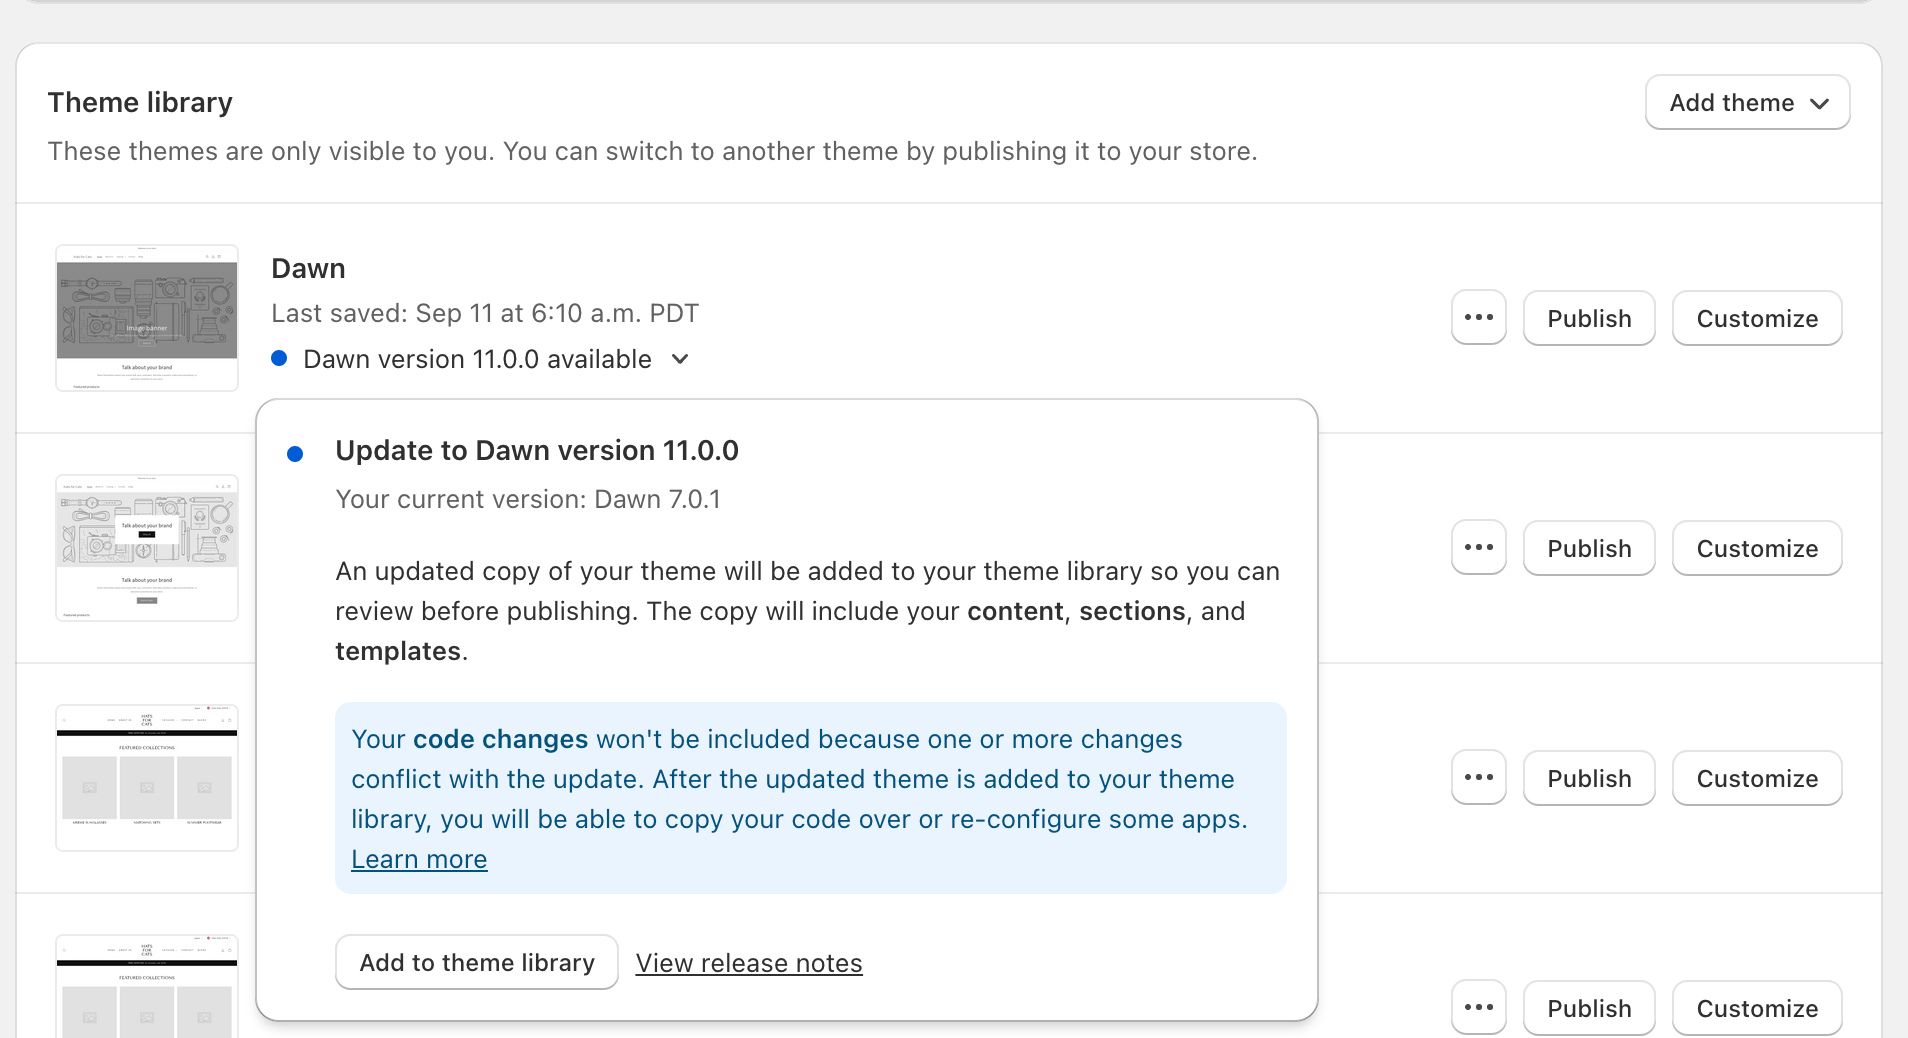
How to Edit Your Shopify Website
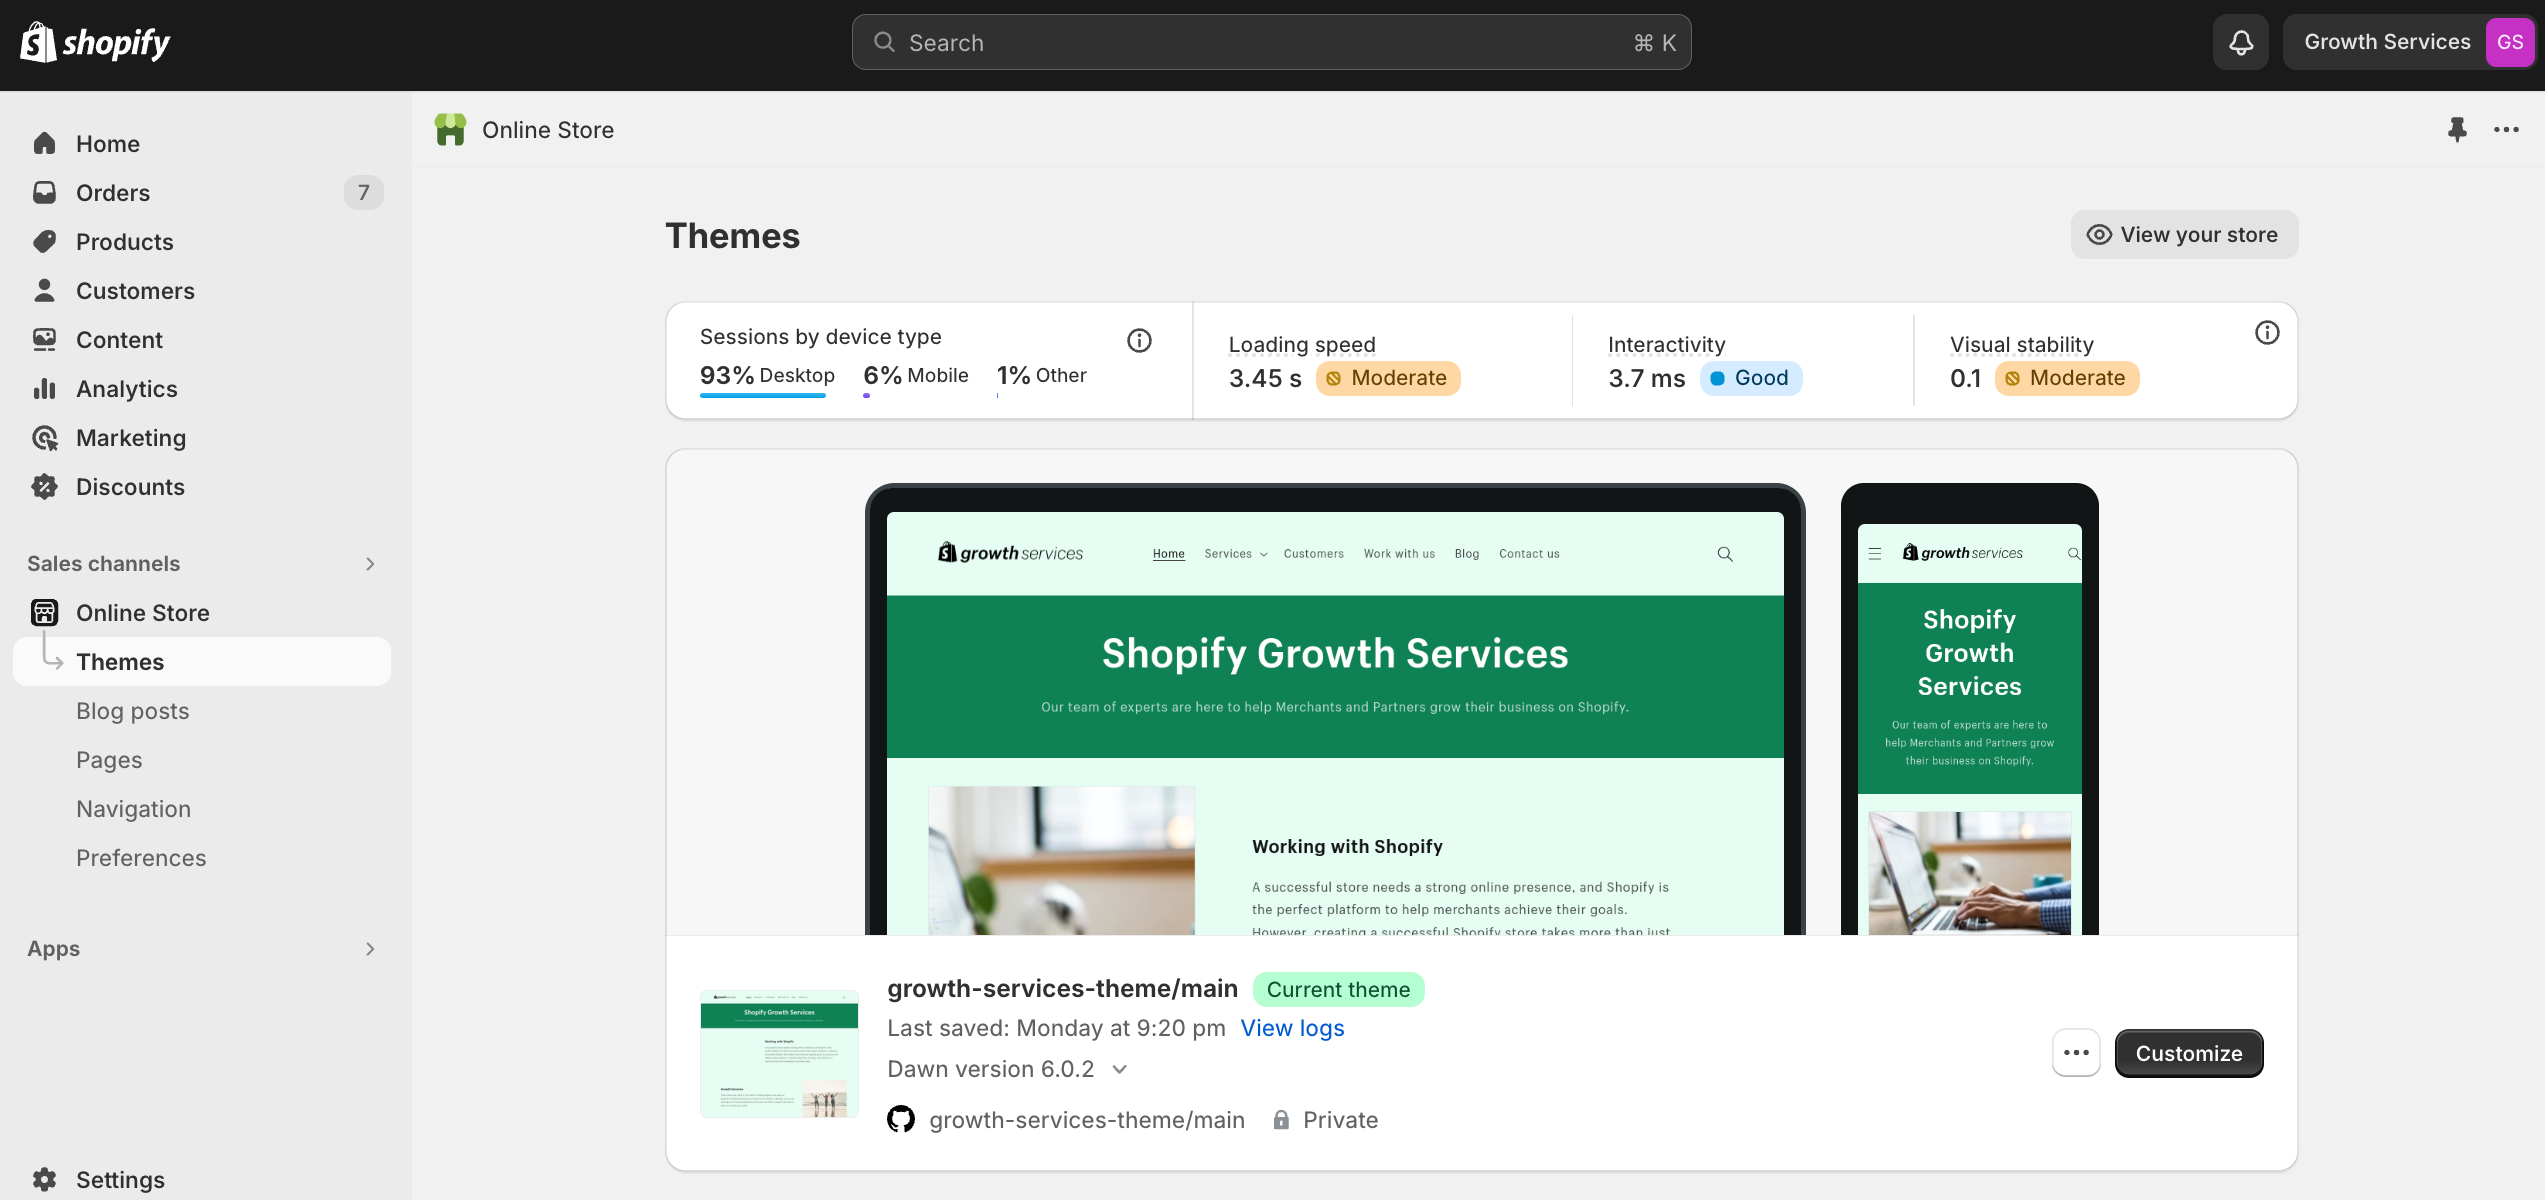
1. Navigate to the Online Store Section: In your Shopify admin, go to "Online Store" and then "Themes."
2. Customize Your Theme: Click "Customize" to open the theme editor. Here, you can modify the layout, colors, fonts, and more.
3. Edit Content: To update text or images, click on the sections you want to change and make your edits.
Remember, a well-maintained site not only looks good but also builds trust with your customers.
Customizing Your Shopify Theme
Your store's look and feel play a significant role in attracting and retaining customers. Customizing your Shopify theme can help your brand stand out and provide a unique shopping experience.
How to Customize Your Shopify Theme
1. Select a Theme: Go to "Online Store" > "Themes" and either choose a new theme or customize your existing one.
2. Use the Theme Editor: Click "Customize" to enter the theme editor. You can adjust sections, add new content, and modify the design to fit your brand.
3. Add Custom Code: If you’re comfortable with coding, you can add custom HTML, CSS, or JavaScript for more advanced customizations.
Remember, a well-maintained site not only looks good but also builds trust with your customers.
Managing Your Store’s Content
Managing your store’s content is crucial for creating a seamless customer experience and driving sales. In this section, we will guide you through the process of creating and managing products, collections, and categories.
Creating and Managing Products, Collections, and Categories
Creating and managing products, collections, and categories effectively can make a significant difference in how customers navigate your store and find what they’re looking for. Here’s how to do it:
- Adding Products: In your Shopify admin, go to the “Products” tab and click “Add product.” Fill in the necessary details like title, description, price, and images. Make sure your product descriptions are clear and informative, and your images are high-quality.
- Organizing Products into Collections: Collections help you group similar products together, making it easier for customers to find what they need. Go to the “Collections” tab and click “Create collection.” You can create manual collections by adding products individually or automated collections based on specific conditions like product type or price.
- Setting Up Categories: Categories are broader groups that can contain multiple collections. For example, a “Men’s Clothing” category might include collections like “Shirts,” “Pants,” and “Accessories.” Use the “Navigation” tab in your Shopify admin to create and manage categories, ensuring your store’s layout is intuitive and user-friendly.
By effectively managing your store’s content, you can create a seamless shopping experience that keeps customers coming back.
Connecting Shopify to Instagram
Social media is a powerful tool for driving traffic and sales. Connecting your Shopify store to Instagram allows you to reach a broader audience and make shopping easier for your followers.

How to Connect Shopify to Instagram
1. Set Up Facebook Sales Channel: Since Instagram shopping is managed through Facebook, you need to set up the Facebook sales channel in Shopify.
2. Connect Your Instagram Account: In the Facebook channel, link your Instagram account.
3. Enable Instagram Shopping: Once connected, follow the prompts to enable Instagram shopping, which allows you to tag products in your posts.
By integrating Instagram with your Shopify store, you can showcase your products in a visually engaging way and drive more traffic to your site.
Changing Your Shopify URL and Domain Name
As your business grows, you might decide to rebrand or simply need a new domain name. Changing your Shopify URL and domain name can be part of that process.
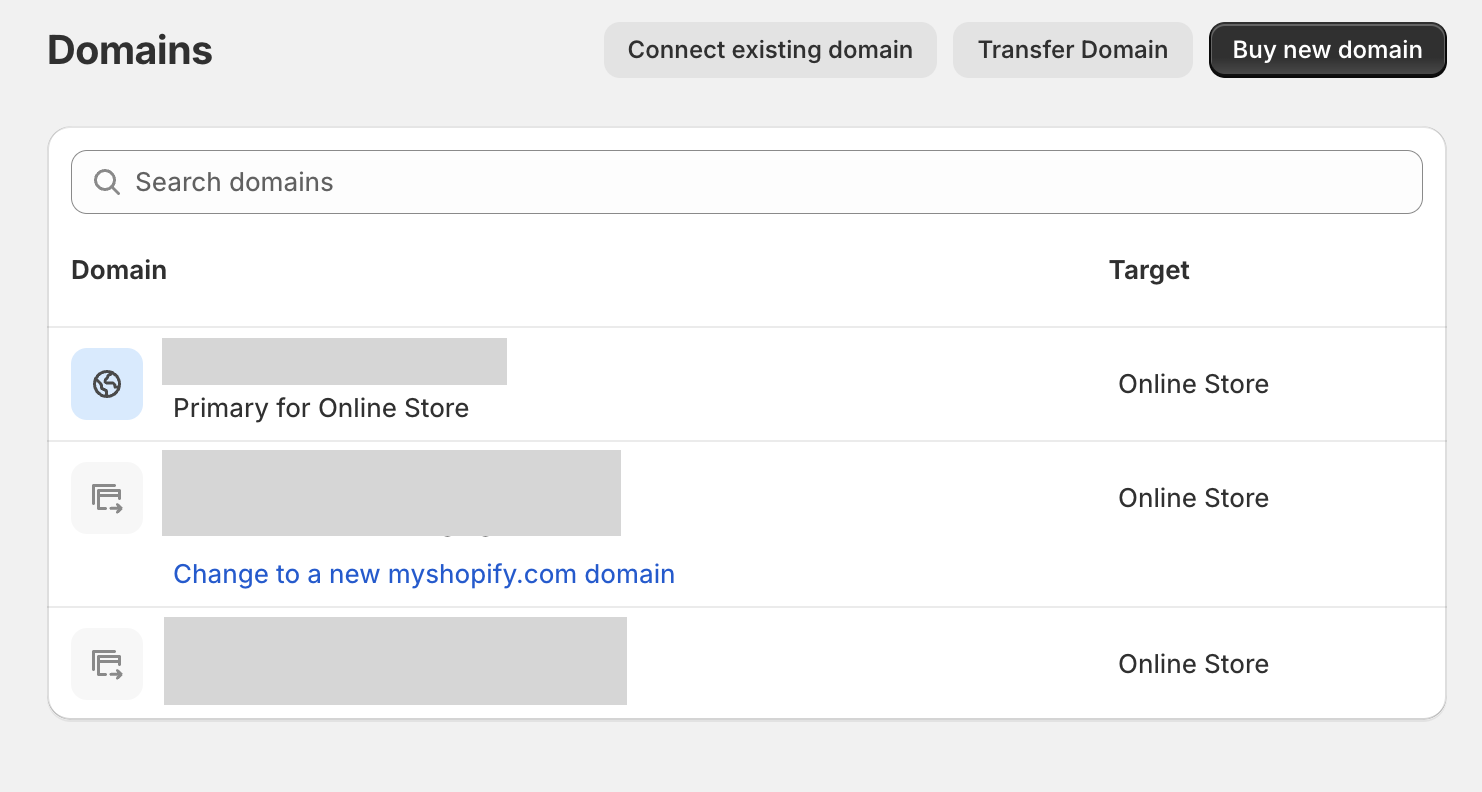
How to Change Your Shopify URL and Domain Name
1. Purchase a New Domain: You can buy a domain directly from Shopify or another domain provider.
2. Add the Domain to Shopify: Go to "Online Store" > "Domains" and click "Add domain." Follow the instructions to connect your new domain.
3. Set the Primary Domain: Once your new domain is connected, set it as your primary domain to ensure all traffic is directed to the new URL.
Adding Reviews to Your Shopify Store
Customer reviews can significantly impact your store’s credibility and sales. They provide social proof and help new customers feel confident in their purchases.
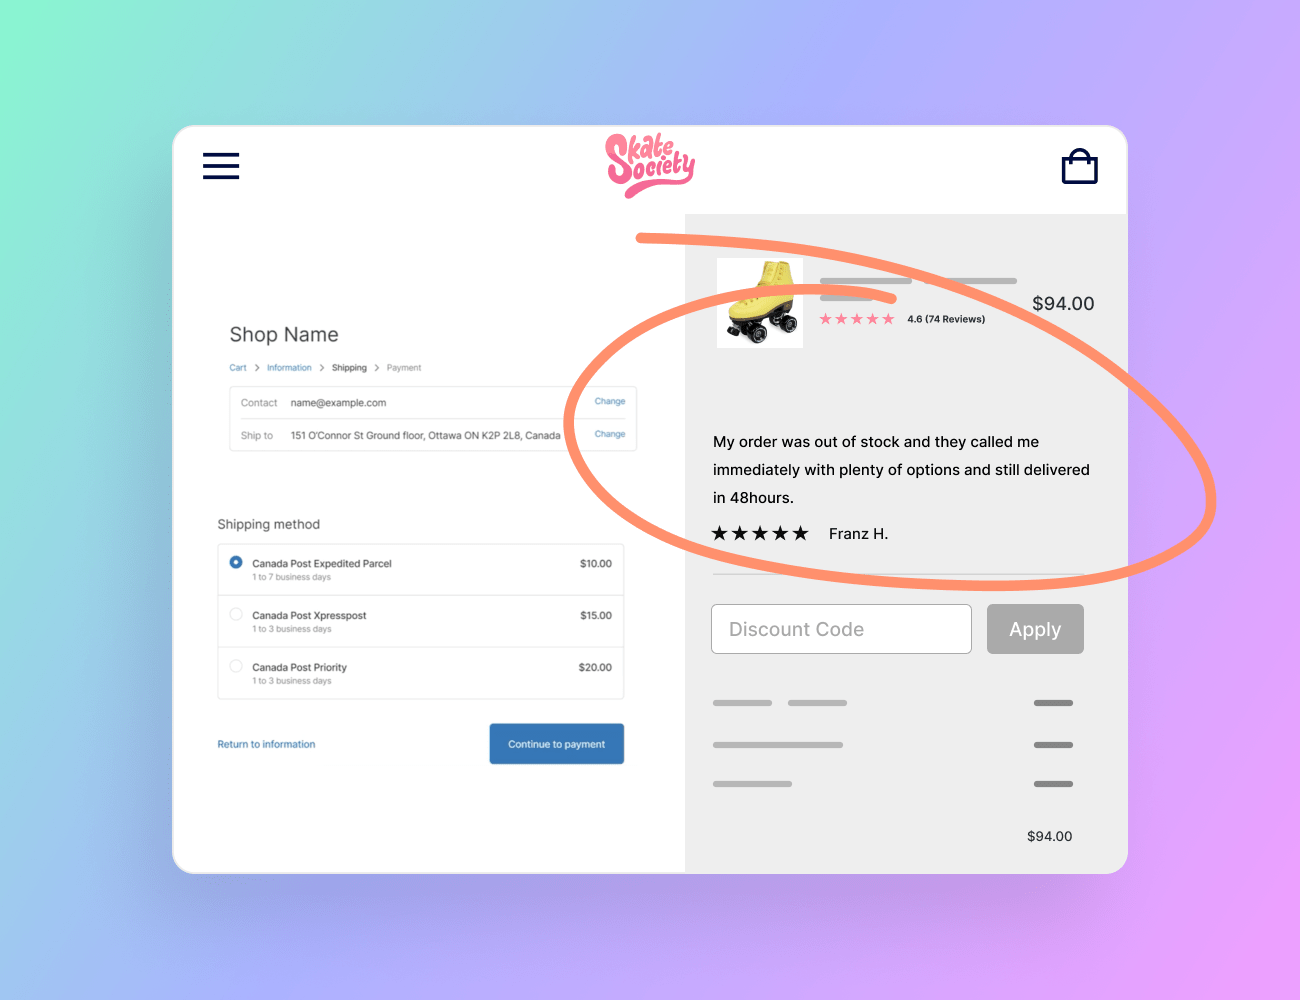
How to Add Reviews to Your Shopify Store
1. Install a Review App: Go to the Shopify App Store and install a review app like Reviews.io or Yotpo.
2. Configure the App: Follow the app’s setup instructions to customize the review display on your product pages.
3. Encourage Reviews: Ask customers to leave reviews by sending follow-up emails post-purchase or offering incentives like discounts.
Having a robust review system in place can boost your store's reputation and increase conversion rates.
Deleting a Shopify Account
Sometimes, you might need to close your Shopify store, whether due to business changes or personal reasons. Deleting your account isn't as simple as clicking a button, but it's straightforward enough.
Steps to Delete Your Shopify Account
1. Back Up Your Data: Before closing your store, ensure you’ve backed up all necessary data.
2. Cancel Paid Apps: Go to "Apps" and cancel any paid apps to avoid future charges.
3. Close Your Store: Navigate to "Settings" > "Plan and permissions," scroll down to the "Store status" section, and click "Sell or close store." Follow the prompts to complete the process.
Ensure you've communicated with your customers and resolved any outstanding orders or issues before closing your store.
FAQs
How Do I Handle Customer Inquiries on Shopify?
Managing customer inquiries effectively is crucial for maintaining a good relationship with your customers. Shopify provides several tools to help you with this. You can set up an FAQ page to answer common questions, use Shopify's built-in email forwarding, or integrate a live chat app like Tidio or LiveChat. Responding promptly and courteously to customer inquiries can enhance customer satisfaction and loyalty.
How Can I Track My Shopify Store's Performance?
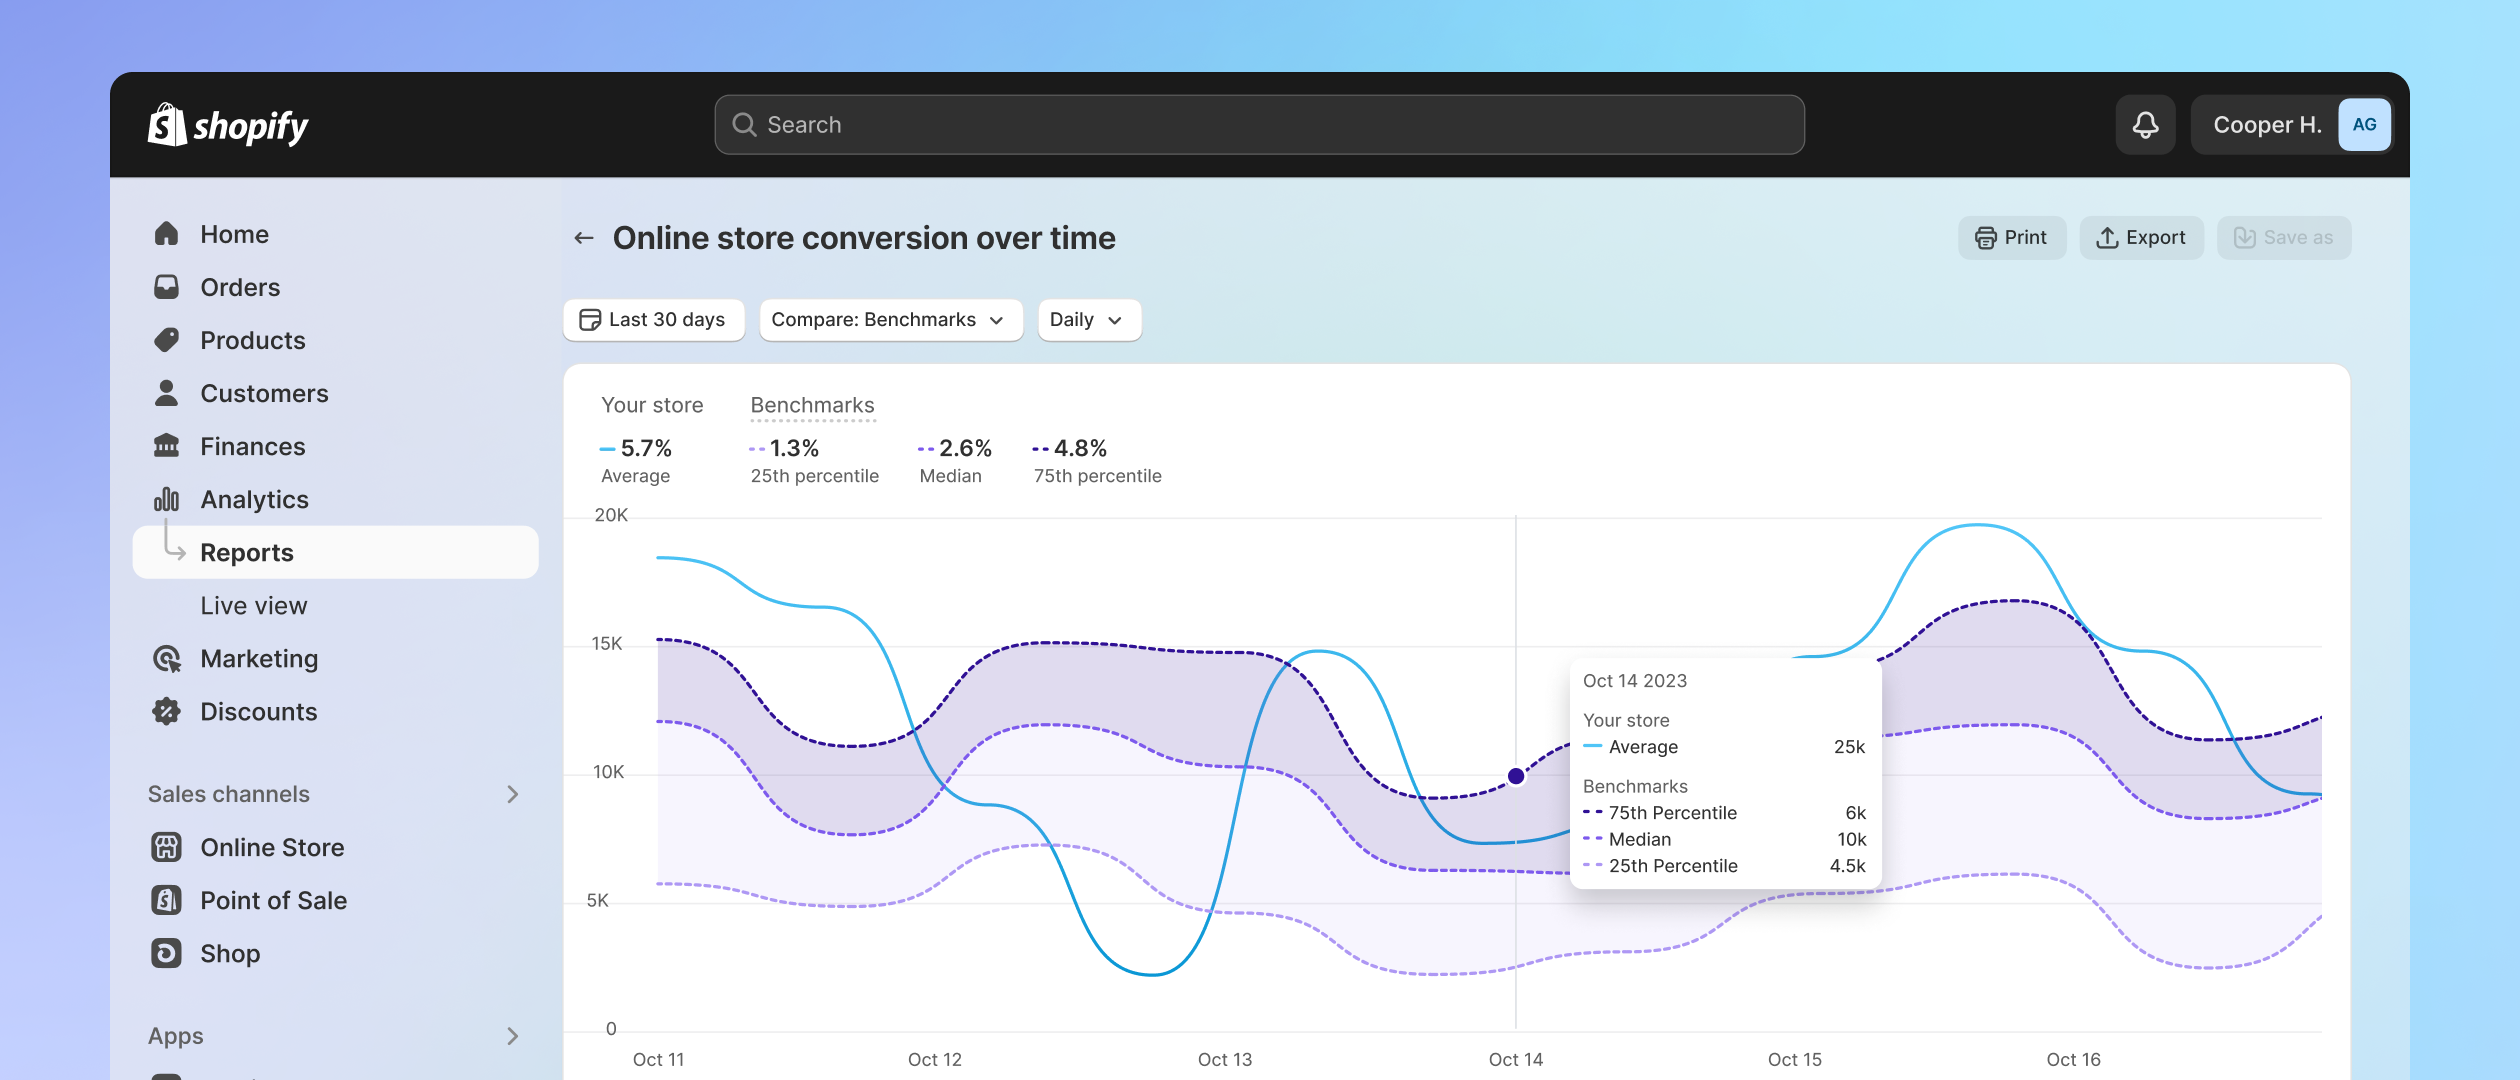
Shopify offers robust analytics tools that help you track your store’s performance. You can access detailed reports on sales, customer behavior, and traffic in the “Analytics” section of your Shopify admin. For more advanced tracking, consider integrating Google Analytics to get deeper insights into your store’s performance and visitor behavior.
What Are the Best Practices for Managing Inventory on Shopify?
Effective inventory management ensures you never run out of stock and helps maintain customer satisfaction. Use Shopify's inventory management tools to keep track of stock levels, set up automatic reminders for low-stock items, and organize your inventory by categories. Regularly auditing your inventory and using apps like Stocky can further streamline the process.
How Can I Improve My Shopify Store's Load Time?
A fast-loading store enhances user experience and improves SEO rankings. To speed up your Shopify store, use optimized images, minimize the use of apps and plugins, and choose a fast, responsive theme. Additionally, enable Shopify’s built-in performance features like the built-in CDN and consider using third-party tools like Google PageSpeed Insights to identify further improvements.
How Do I Manage Multiple Shopify Stores?
If you’re running multiple Shopify stores, organization is key. Each store will have its own Shopify account, so managing them can be a bit of a juggle. Use tools like Shopify Plus, which allows you to manage multiple stores from a single dashboard. Alternatively, apps like Stitch Labs or TradeGecko can help you streamline inventory and order management across all your stores.
Wrapping Up
Managing a Shopify store doesn't have to be a headache.
By following these tips and using the right tools, you can streamline your store management and focus on what matters most—growing your business. From finding your URL to customizing themes and managing payments, every aspect of your store can be optimized for success. Happy selling!


